Yarn Snowflake Decor

 Holiday Yarn Snowflake Decor
 
 Don't forget to PIN this!!

You can find all of these items at your local dollar store or already around the home, making your own snowflake easy and super cheap!  Coming in at $2-$4 each!

You will need:
-Popsicle sticks (wide ones)
-Yarn of choice (1-2 balls of yarn) -- I used a fringed ice blue yarn.
-Decorations  -- I used buttons & a glittered card stock dove I had save from a Christmas gift tag.

**Hot glue gun and glue sticks.

Tutorial:
Count out how may popsicle sticks you will need to make your snowflake.
(here's a great Popsicle stick snowflake tutorial for your reference)

Wrap each stick in Yarn hot gluing twine down along the way.

When all popsicle sticks are wrapped in yarn, hot glue them together in snowflake shape.

Wrap each of the intersecting points and centre with the yarn to further secure the snowflake.

Add centrepiece or decorations if you decide.


You may also like:
Rustic Twine Snowflake
Snowflake Wreath

DIY Snowflake Wreath

Using left over tulle, last years ornaments, and some red Christmas mesh I used my popsicle stick snowflake base to create my own FRONT DOOR SNOWFLAKE WREATH this year.
 
Don't forget to Pin this!!
You will need:
- Popsicle sticks (wide ones)
- Tulle or netting/mesh (or both) in your choice of colors
- Tying string, yarn, or curling ribbon (matching tulle)
        -- I used a fuzzy white yarn which gave a added fluffy snow effect.
- Ornaments
     -- I used small red ball ornaments, glitter ball ornaments, red snowflake glitter ornaments Lrg, red and green Sml glittered snowflakes.

** hot glue gun and  hot glue

Don't forget to Pin this!!


First start by making your popsicle stick snowflake in shape of choice
 ( here's a great Popsicle stick snowflake tutorial for your reference) -no need to paint them-

Cut strips (6-7') wide of tulle or netting/ mesh.

Using your string tie your tulle down to the popsicle stick base every couple inches.. gathering and bunching tulle along the way for a more 'fluffy' effect. This is the same process used in most wreath making tutorials. Strip by strip your wreath will eventually fill out.

Finally comes the fun part, when your wreath is a 'full' as you like your can start adding decorations! Tie down and hot glue on your decorations of choice!

You may also like:
Rustic Twine Snowflake Wall Hanging 
Yarn Snowflake Decor

Rustic Twine Snowflake Wreath
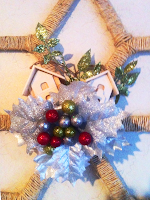
Christmas decor twine rustic wreath!
 
 Don't forget to Pin this!!
You can find all of these items at the local Dollar Store, making this project come in at under $5! Makes a great hostess gift this holiday season! Although, warning twine wrapping can be time consuming until your get the hang of it  :)

You will need:
-Twine 2-3 balls
-Popsicle sticks (wide)
-Decorations/ centrepiece

*Hot glue gun & sticks

SUPER EASY Tutorial:
Count out how may popsicle sticks you will need to make your snowflake.
( here's a great Popsicle stick snowflake tutorial for your reference)

Wrap each stick in twine hot gluing twine down along the way.

When all popsicle sticks are wrapped in twine, hot glue them together in snowflake shape.

Wrap each of the intersecting points and centre of snowflake in twine to further stabilize.

Add centrepiece or decorations if you decide.


You may also like:
Snowflake Wreath
Yarn Snowflake Decor


DIY 'Princess' Flower Easy Canopy

DIY Easy Canopy! 

Perfect for baby/ girls room, pre-teens & more! Beautiful over the bed or in quiet reading corner!

You will need:
- Artificial flowers in color of choice.
- Crafting gemstones
- Tulle  ++crafters advice, check online sites for used wedding left overs and save big!
- String beads (I used pearls)
- Wide ribbon (for hanging)
- Iridescent sequins (optional)
- Base Hoop * can use anything* I cut off the top (approx 4") of a 5 gal bucket. 

Tools: Hot glue, Needle and Thread, scissors. 


Start by tying your wide hanging ribbon onto your base hoop, making sure it will hang evenly. Cut strips of tulle (approx 5-6') wrap entire base hoop hot gluing secure along the way.

Attach tulle to base hoop either by hot gluing on or sewing around circumference of hoop.  Remembering to leave gap in front of your hoop for curtain opening.

Hot glue / sew your hanging bead strings onto hoop.

Finally cover your hoop with your artificial flowers hot gluing them into place. add gemstones to centre of some flowers for extra bling.

Optional stitch some scattered iridescent sequins onto tulle for a extra glimmer-y effect.

**Making for baby/ toddler?? especially over the bed, I highly recommend Stitching everything in place as well for extra durability.


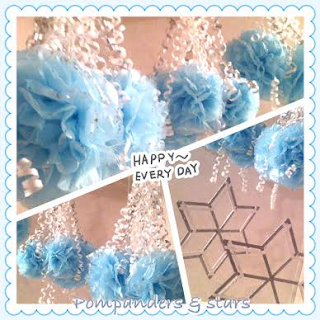
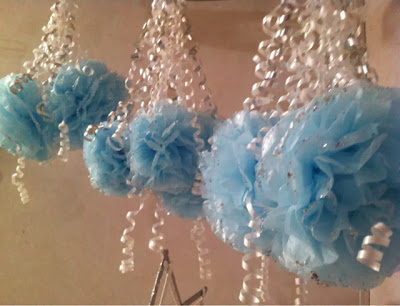
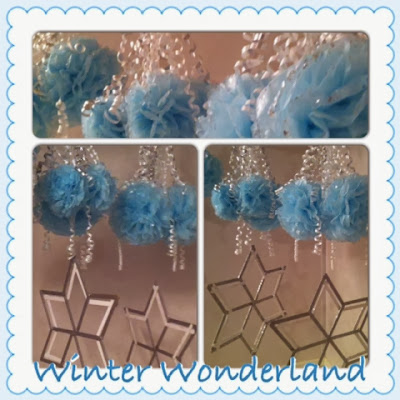
Snow Pomanders

Craft snowflake, star pompanders easy winter, party, wedding decorations 

LET IT SNOW! Inside and out with these beautiful snowflake pomanders!!


To make from scratch, You will need: 
Tissue paper 
Curling ribbon- white,silver
Glitter paint -silver
Popsicle sticks
Craft paint - silver white
(I found all items at local dollar store) 
Also hot glue gun

Start by making snow flake (or star) from Popsicle sticks. (Popsicle stick snowflake tutorial

Also, make several small-medium sized Pomanders I found great tutorial on The Budget Savvy Bride.com Pomanders tutorial
Glitter Paint the edges of your Pomanders. Set aside and let dry. When dry, cluster 3-4 Pomanders in groups, tie together.

Attach Popsicle stick snowflake by tying a clear fishing line around snow flake and tie up through the center of Pomanders. Let snowflake hang down an few inches below Pomanders to give the floating illusion.
Craft snowflake, star pompanders easy winter, party, wedding decorations

Finish by adding curling ribbons to the hanging string for extra whimsy. You can either tie the ribbons on to hanging string then curl,  or pre curl ribbons and hot glue them to centre hanging string. Using both of these methods together seemed to work best for me.

Craft snowflake, star pompanders easy winter, party, wedding decorations
Craft snowflake, star pompanders easy winter or party decorations

DIY Charm Bracelets

Save old/ broken jewellery, left over beads, buttons, gemstones, and make your very own DIY charm bracelet!!

craft charm bracelet easy beading project
You will need:
Jewellery links, elastic cord, bracelet clasps, think wire and needle nose pliers (or jewellery pliers)

Pretty simple, use the elastic cord and bead a bracelet with your choice of closure. String together charms on wire (1"-1.5") attach a link to one end of the charm and use it to join to bracelet..


craft charm bracelet easy beading project


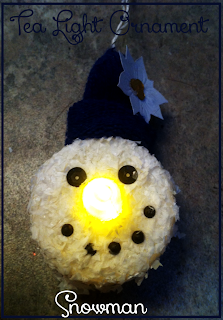
Handmade Ornaments- Tea Light Snowmen

I have came across this 'Pin' before as a snowman magnet version. And since I had a small stockpile of tea lights left over from my wedding I thought I would try my hand at a snowman ornament.
easy craft project DIY snowman ornament, light up nose!
DON'T FORGET TO PIN THIS!!


You will need:
-Battery op tea light 
-Liquid glue (that works on plastic)
-Plastic bag -white 
-Small string for hanging ornament

Cut small strips of plastic bag, blend in blender or mulch with scissors until you have "snow" consistency. Can also use a course iridescent glitter instead.

Tie your string around circumference of tea light,keeping the string close the the centre if the side.Double knotting string secure (which will be top of head)

Brush glue over the front and sides of tea light (leaving the back alone) and wipe any glue off of tea light 'flame.' Sprinkle your plastic bag snow over tea light making sure to cover front and sides,. Lightly push the 'snowflakes' into the glue. Let dry over night.

Decorating your snow man! Use hot glue or super glue to add you own accessories for you very own unique snow man!
One Pin many SPINS!!.. 

Eyes
-Google eyes -Black sequins -Paint -Beads

Mouth 
-Small beads -Small sequins -Paint -Puffy paint  -Small piece of string

Accessories
-A Mitten hat / look through your closet for singles! (Cut off fingertip,roll edge) 
-Fabric/ fleece scarf or tie 
-small bead string necklace
-small craft wings 
-wire or pipe-cleaner halo
-small piece of tulle veil (newlyweds?)

You man also like:
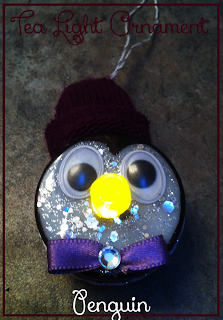
Tea light penguin ornament

Handmade ornaments - Tea Light Penguins

I have came across this 'PIN' before as a snowman magnet version. And since I had a small stockpile of tea lights left over from my wedding I thought I would try my hand at spinning the Pin.. 


easy craft project DIY penguin ornament, light up nose!
DONT FORGET TO PIN IT!!
You will need:
-Battery op tea light 
-Black permanent marker or paint pen
Can use black plastic paint and brush on if you have steady hand
-Small string for hanging ornament.
Decorating Accessories - See below- 

Tie your string around circumference of tea light,keeping the string close the the center of the side.Double knotting string secure (which will be top of head)

Paint sides and the face outline on front of tea light dry over night. 

Decorating your penguin! Hot glue on your choices to create your own unique penguin. Look for what you have! 
One Pin many SPINS!!.. 

Eyes
-Google eyes -Black sequins - Paint - Beads

Mouth 
-Small beads -Small sequins -Paint  -Puffy paint -Small piece of string

Accessories
-A Mitten hat / look through your closet for singles! (Cut off fingertip,roll edge) 
-Fabric/ fleece scarf or tie 
-Small bow bow tie or hair bow 
-Small bead string necklace
-Small craft wings 
-Piece of tulle Veil

You may also like,   

Popsicle Snow Flake Wreaths & More!

ONE concept many possible executions!!
It all started as many of my craft ideas do, on Pinterest. I had found a Popsicle stick snowflake pin,
which was a broken link, but with a quick google image search I found..
  http://www.curbly.compopsicle-stick-snowflakes


 Although fairly simple, (a little hot glue, paint and popsicle sticks is all you need) follow the above link and you will find a great tutorial of how to make them..

First I started as most Pin heads do by duplicating the idea.. I chose colors to match my holiday scheme and.. voila! Giant popsicle stick snowflakes now danced on my walls..and in my head.
(My snowflakes, hung with clear thumbtack to give floating illusion, may still add plaid bows)

easy craft project popsicle stick snowflakes wall art

After running out of wall space, and getting sick of painting sticks. I decided to take the concept further.. I can cover these snowflakes in any kind of material I want.. to the craft room!
 I always welcome the opportunity to dig into the craft closet and re-purpose old and left over materials. (Like the 2 balls of twine I had never used from a summer camping project.) Twine worked out perfect because I just happen to be going with a rustic theme this year.  


Popsicle stick snowflakes Christmas decor twine rustic wreath(SPIN 1)
TWINE SNOWFLAKE WREATH


SUPER EASY Tutorial:


(SPIN 2)
 FRONT DOOR SNOWFLAKE WREATH


Tutorial:


YARN SNOWFLAKE WREATH
Tutorial:
easy DIY Snowflake wreath for babys/ childs room.


You may also like: 

Snow Stars and Pomanders Tutorial


Feather Boa Wreath

Boa Wreath, perfect for little girls room, babies 1st Christmas?? or even if your just planning on having a pink Christmas this year!

I've seem them for sale before but they were fairly costly,
Make your very own for under $8!

I happened to have most of these items laying about in my craft room as leftovers from other projects.. Switch the colours and items up, SPIN MY PIN & use what you have!

Popsicle sticks (wide ones)                $1             (50 pack, will have extra)
Boas x 2                                          $2.50
Bulb Ornaments                               $1             (12 pack, will have extra)
Pearl Necklace                                 $1
Pink? Ribbon  (wide for bows)       $1
Sliver Ribbon (thin)                        $1
  (All courtesy of the local $1 store.)
** Also Needed: Glue gun and hot glue sticks.

SO EASY TUTORIAL!
START, by hot gluing your wide popsicle sticks into an octagon shape..

Take boa and hot glue onto octagon frame.
Trick, find the cord/center of the boa and push this into the glue. Hot gluing the cord instead of the feathers will make a more stable wreath. 

IF using $ store boas you will need to glue two boas around frame to make a more fuller wreath

Now simply decorate by tying on ornaments, gluing on bows & accents. Light enough to hang with a thumb tack or add a pretty ribbon for hanging!